


You might find your yard work takes too long. Perhaps your weed eater struggles to cut through tough weeds. You could also feel constant frustration with your tool. These issues often point to a failing trimmer line.
Key Takeaways
- Recognize signs of a bad trimmer line, like constant breaking or poor cutting, to know when to replace it.
- Replacing your trimmer line makes your tool work better, speeds up yard work, and keeps you safer.
- Always use the right size line for your trimmer and store it well to make it last longer.
5 Signs Your Trimmer Line Needs Replacing
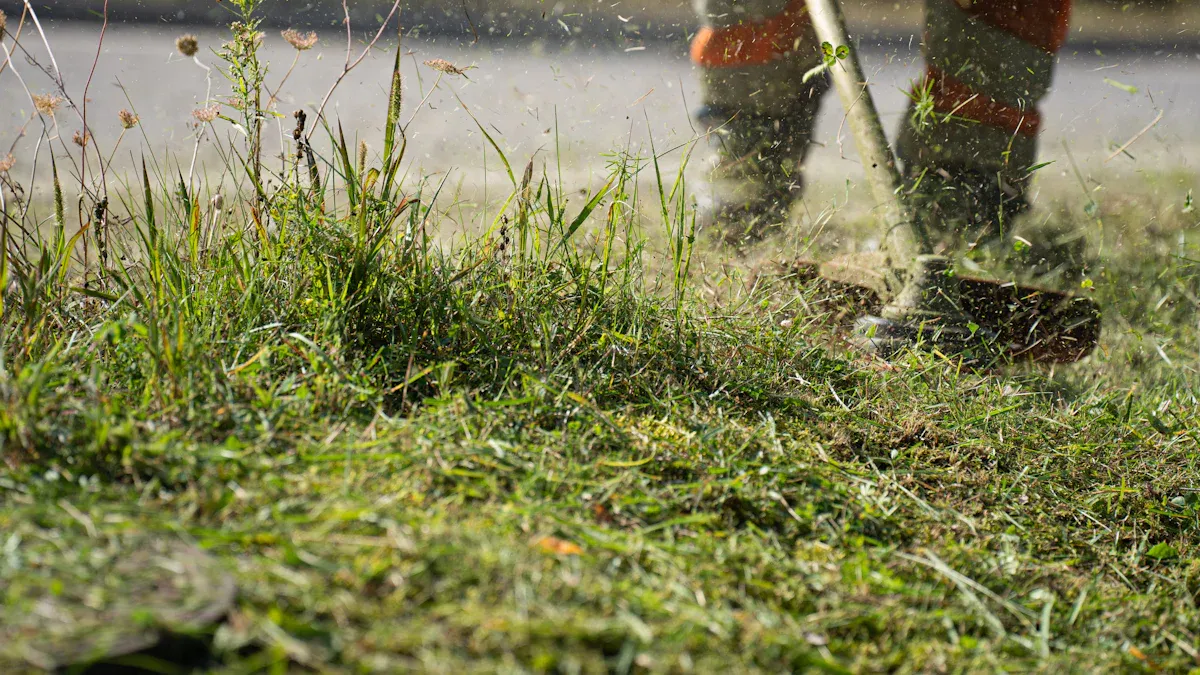
You rely on your trimmer to keep your yard neat. But sometimes, your tool tells you it needs attention. Recognizing these signs helps you fix problems quickly. You can get back to efficient yard work.
Constant Trimmer Line Breakage
You might notice your trimmer line breaks often. This happens when you hit hard objects like fences, concrete, or rocks. Old or brittle line also breaks easily. You stop frequently to replace it. This constant interruption makes your yard work take much longer. It also causes frustration.
Frayed or Worn Trimmer Line
Look closely at your line. You might see it looks fuzzy, thin, or brittle. Sun exposure and heavy use cause this wear. A worn line cannot cut effectively. It struggles to slice through weeds. You will find yourself going over the same spots repeatedly.
Reduced Trimmer Line Cutting Power
Your trimmer might not cut weeds cleanly. You have to pass over the same spot many times. This means your line has lost its cutting power. The line might be dull or too thin for the job. You spend more time and effort on your yard. The results are often unsatisfactory.
Uneven Trimmer Line Cutting
You might see patchy cuts in your yard. Some areas look too high, others too low. This happens when one side of your line is shorter. It could also be more worn than the other side. An uneven line creates an unprofessional look for your lawn.
Difficulty Advancing Trimmer Line
Your trimmer line might not feed out easily. You have to pull it out by hand. The line could be tangled inside the spool. Sometimes, it fuses together from heat. This constant stopping causes much frustration. It also slows down your progress significantly.
Why a Fresh Trimmer Line Matters
You might wonder if replacing your trimmer line is truly worth the effort. A fresh line offers many benefits. It improves your tool’s function and makes your yard work easier.
Boost Your Trimmer’s Performance
A new line cuts weeds and grass cleanly. It slices through tough vegetation with ease. Your trimmer operates at its best. You get a crisp, even cut every time. This makes your yard look much neater.
Reduce Trimmer Strain
An old, worn line forces your trimmer’s motor to work harder. This extra effort can damage the motor over time. A fresh, sharp line reduces this strain. Your trimmer runs smoothly. This extends the life of your tool.
Speed Up Yard Work
You finish your tasks much faster with a good line. You do not need to go over the same spots repeatedly. The line cuts efficiently on the first pass. This saves you valuable time. You can enjoy your free time sooner.
Ensure Safer Trimmer Operation
A brittle or frayed line can break unexpectedly. Pieces might fly off, creating a hazard. A strong, new line reduces this risk. It stays intact during use. You operate your trimmer with greater safety.

Preparing to Replace Your Trimmer Line
Gather Your Trimmer Line Supplies
Before you start, collect all the items you will need. You must have your new trimmer line. Make sure it is the correct diameter and shape for your specific trimmer model. Check your trimmer’s specifications for this detail. You will also need a sharp cutting tool, such as heavy-duty scissors or a utility knife, to cut the line cleanly. Sometimes, a pair of needle-nose pliers helps if the old line is stuck. Keep a clean cloth or rag handy. You can use it to wipe away any dirt or grass clippings from the trimmer head.
Consult Your Trimmer Manual
Your trimmer’s manual is an invaluable resource. It provides detailed, model-specific instructions for replacing the line. You will find crucial information there. This includes the exact line diameter and type your trimmer requires. The manual also clearly illustrates how to open the trimmer head. It shows the correct winding direction for the line. Following these manufacturer guidelines prevents mistakes. It ensures your trimmer functions properly and safely after the replacement.
Prioritize Trimmer Safety
Safety always comes first when you work with power tools. Always disconnect your trimmer from its power source before you begin. If your trimmer is electric, unplug it from the outlet. For gas-powered models, remove the spark plug wire. This step prevents any accidental starting of the motor. Wear durable work gloves to protect your hands from sharp edges or potential nicks. Safety glasses are also essential; they shield your eyes from any debris that might fly out. These simple precautions ensure your safety throughout the replacement process.
How to Remove Old Trimmer Line
You need to remove the old line before you can install new line. This process is straightforward. Follow these steps carefully.
Disconnect Trimmer Power
Safety is your first concern. You must always disconnect your trimmer from its power source.
Tip: Unplug electric trimmers from the wall outlet. For gas-powered trimmers, remove the spark plug wire. This prevents the engine from accidentally starting. You stay safe during the entire process.
Open the Trimmer Head
You need to access the spool inside the trimmer head. Most trimmer heads open in one of two ways. You might find release tabs on the sides of the head. Press these tabs inward. Then, pull the cover off. Other trimmer heads twist counter-clockwise to unlock. Your manual will show you the exact method for your model. Once open, you will see the spool.
Unwind the Old Trimmer Line
Now, you can remove the old line. Pull out any remaining pieces of the old trimmer line from the spool. Sometimes, the line might be tangled or stuck. Gently pull it free. Make sure you remove all fragments. You want the spool completely empty. This prepares it for the new line.
Clean the Trimmer Spool
Take this opportunity to clean the spool and the inside of the trimmer head. Wipe away any dirt, grass clippings, or debris. Use a clean cloth. A clean spool helps the new line feed smoothly. It also prevents future tangles. This simple cleaning step improves your trimmer’s performance.
How to Install New Trimmer Line
You have removed the old line. Now you are ready to install the new one. This process brings your trimmer back to peak performance. Follow these steps carefully.
Choose the Right Trimmer Line
You must select the correct trimmer line for your tool. Your trimmer manual provides specific details. It tells you the exact diameter and shape you need. Using the wrong size can damage your trimmer. It also affects cutting efficiency. Lines come in different shapes like round, square, or star. Each shape offers different cutting benefits. Round line is durable for general use. Square or star shapes cut tougher weeds more aggressively.
Measure and Cut Trimmer Line
You need the right length of line. Check your trimmer’s manual for the recommended length. A common length is about 15 to 20 feet for a single line. For dual-line trimmers, you will cut two equal pieces. You can also measure by wrapping the line around your forearm. This gives you a good estimate. Cut the line cleanly with sharp scissors or a utility knife. A clean cut prevents fraying.
Find the Trimmer Line Starting Point
Look at your trimmer’s spool. You will find a small hole or notch. This is the starting point for winding your new line. Some spools have arrows indicating the winding direction. Pay attention to these markings. They guide you in the correct way to load the line.
Wind the Trimmer Line Evenly
Insert one end of your measured line into the starting hole. Begin winding the line onto the spool. Keep the line tight and even. Avoid overlapping the line. Overlapping causes tangles and feeding problems. If your trimmer has two lines, wind each line onto its designated side of the spool. Many spools have a divider for this purpose. Follow the arrows for the correct winding direction. Maintain constant tension as you wind.
Tip: If your spool has two separate compartments, wind each line in opposite directions as indicated by the arrows. This ensures proper feeding.
Secure the Trimmer Line
Once you have wound the line, you need to secure it. Most spools have small notches or clips on the edge. These hold the end of the line in place. Hook the end of the line into one of these notches. This prevents the line from unwinding. Leave a few inches of line hanging out. This excess will feed through the eyelets in the trimmer head.
Reassemble the Trimmer Head
Align the spool with the trimmer head casing. Make sure the secured line ends feed through the eyelets on the head. These are the small holes where the line exits. Snap the cover back onto the trimmer head. If your head twists on, turn it clockwise until it locks. Give the line a gentle tug. It should feel secure and ready to feed.
Special Cases for Trimmer Line Replacement
Sometimes, your trimmer might have unique features. These features change how you replace the line or maintain the head. Understanding these special cases helps you keep your tool in top shape.
Trimmers Without a Reel
Some trimmers operate differently from standard models. They do not use a winding reel for their cutting line. Instead, these tools feature fixed-line heads. You insert individual, pre-cut pieces of line directly into these heads. This method makes line replacement very simple and quick. You just push the old, worn piece out of its slot. Then, you slide a new, fresh piece into place. This system is often much faster than winding a long line onto a spool. It also helps you avoid common issues like tangled lines or lines fusing together from heat. Always ensure you use the correct length and diameter for these pre-cut pieces. Your trimmer’s manual will provide these specific details. Using the right line ensures efficient cutting and prevents damage to your tool. This type of head is popular for its ease of use.
Cleaning the Trimmer Head
You should make cleaning your trimmer head a regular part of your maintenance routine. Grass clippings, dirt, and other plant debris often build up inside the head. This accumulation can cause several operational problems. It makes the cutting line stick inside the head. It also prevents the line from feeding out smoothly when you need it. Use a small, stiff brush or a sturdy cloth to clean. Carefully remove all the accumulated gunk from the inside of the head and around the spool area. A clean head works much better. It allows the line to move freely. This helps your cutting line last longer because it reduces friction and stress. This simple maintenance step significantly improves your tool’s overall performance. It also makes your yard work easier and more efficient.
Tips for Extending Trimmer Line Life
You can make your line last longer. Proper care and technique save you time and money. Follow these simple tips.
Store Trimmer Line Properly
Store your line in a cool, dry place. Keep it away from direct sunlight. Heat and UV rays make the line brittle. This causes it to break more easily. You should keep it in its original packaging. This protects it from the elements.
Avoid Hard Surfaces with Trimmer Line
You should avoid hitting hard surfaces. Concrete, fences, and rocks quickly wear down your line. They cause it to fray and break. Use caution when trimming near these obstacles. You can slow down your speed. This helps preserve the line.
Use the Right Trimmer Technique
Use the tip of the line to cut. Do not force the entire line into thick weeds. A gentle sweeping motion works best. You cut more efficiently this way. This technique also reduces stress on the line. It prevents unnecessary breakage.
Don’t Overfill Trimmer Line
Do not put too much line on your spool. Overfilling causes tangles inside the head. It also creates friction and heat. This can fuse the line together. Always follow your trimmer’s manual for the correct capacity.
Do not let a failing trimmer line ruin your yard work. A simple, effective fix is replacing your old line. You will enjoy a cleaner, neater yard. Your tool will function properly. This makes your trimming tasks much easier and more efficient.
FAQ
What happens if you use the wrong size trimmer line?
Using the wrong size line can damage your trimmer. It reduces cutting efficiency. Your trimmer motor works harder. Always check your manual for the correct diameter.
How often should you replace your trimmer line?
Replace your line when it shows signs of wear. Look for fraying, constant breaking, or reduced cutting power. Heavy use means more frequent changes. Store it properly to extend its life.
Can you use any type of trimmer line in your trimmer?
No, you cannot use just any line. Your trimmer requires a specific diameter and type. Consult your trimmer’s manual. Using the correct line ensures optimal performance and safety.
Post time: Oct-27-2025